Deals Management
Track sales opportunities and customer inquiries from start to finish in PackWares CMS.
Open in AppLearn how to create and manage deals in PackWares CMS. Deals help you track sales opportunities from initial inquiry to final order.
Creating a New Deal
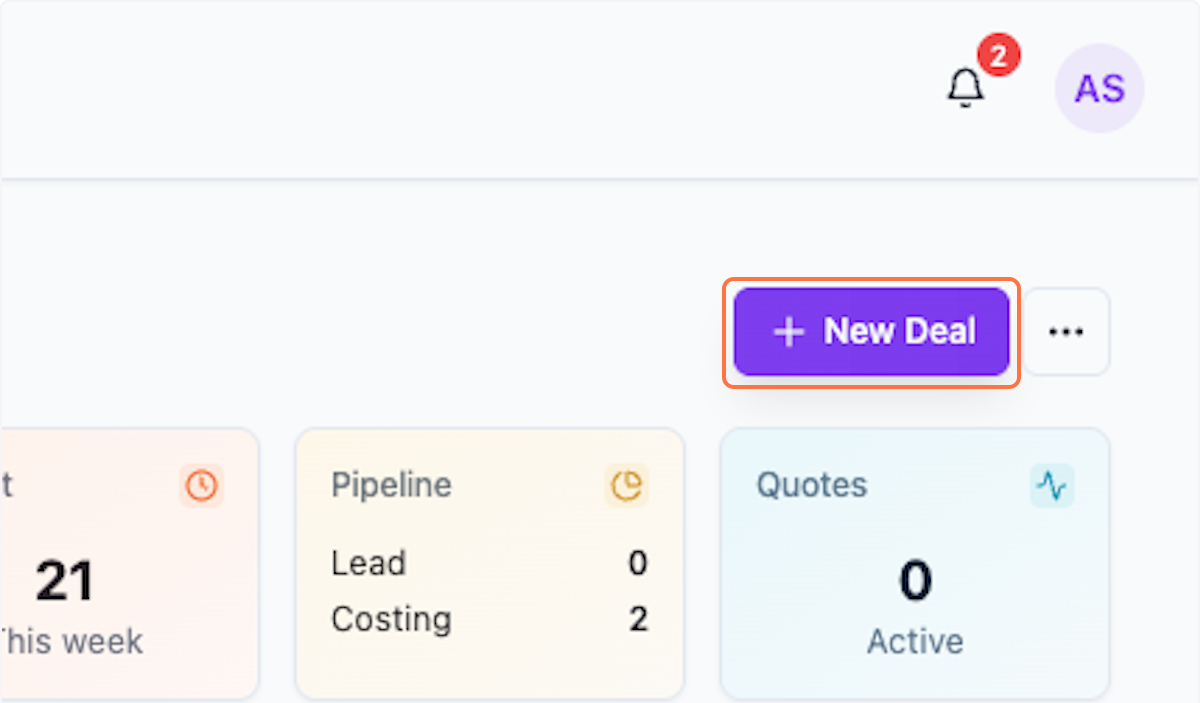
Step 1: Click on New Deal
Start by clicking the New Deal button to create a new deal.
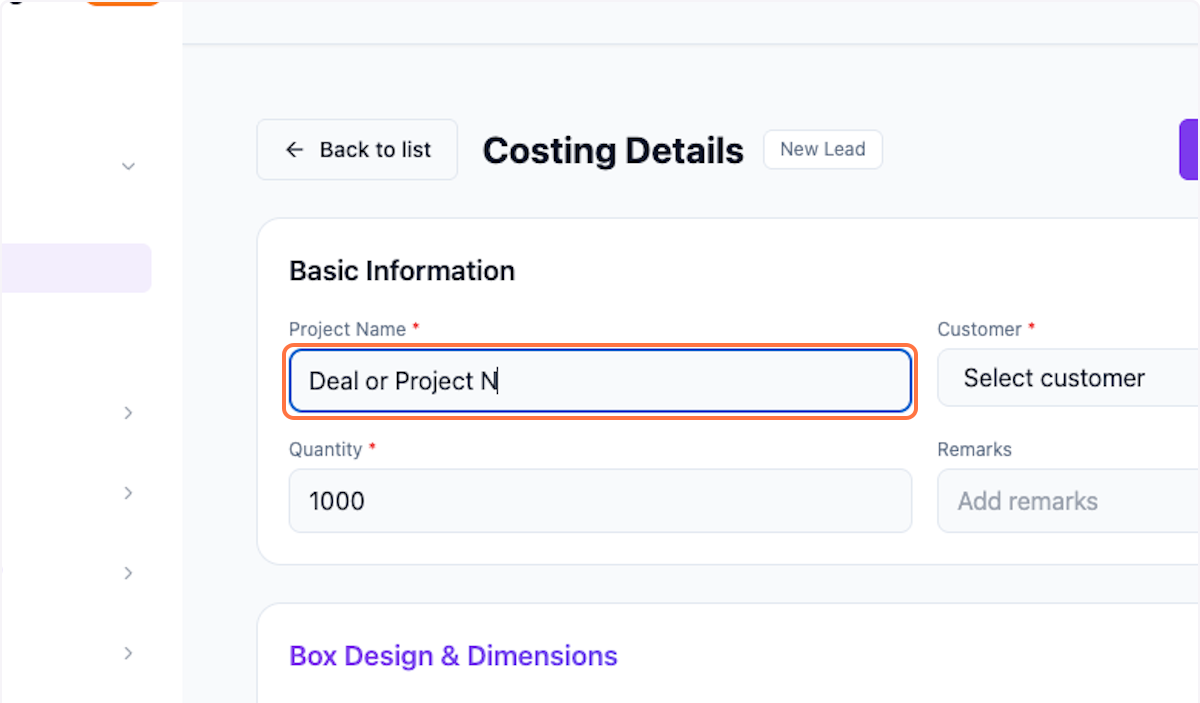
Step 2: Enter Deal or Project Name
Type the name of the deal or project for easy identification.
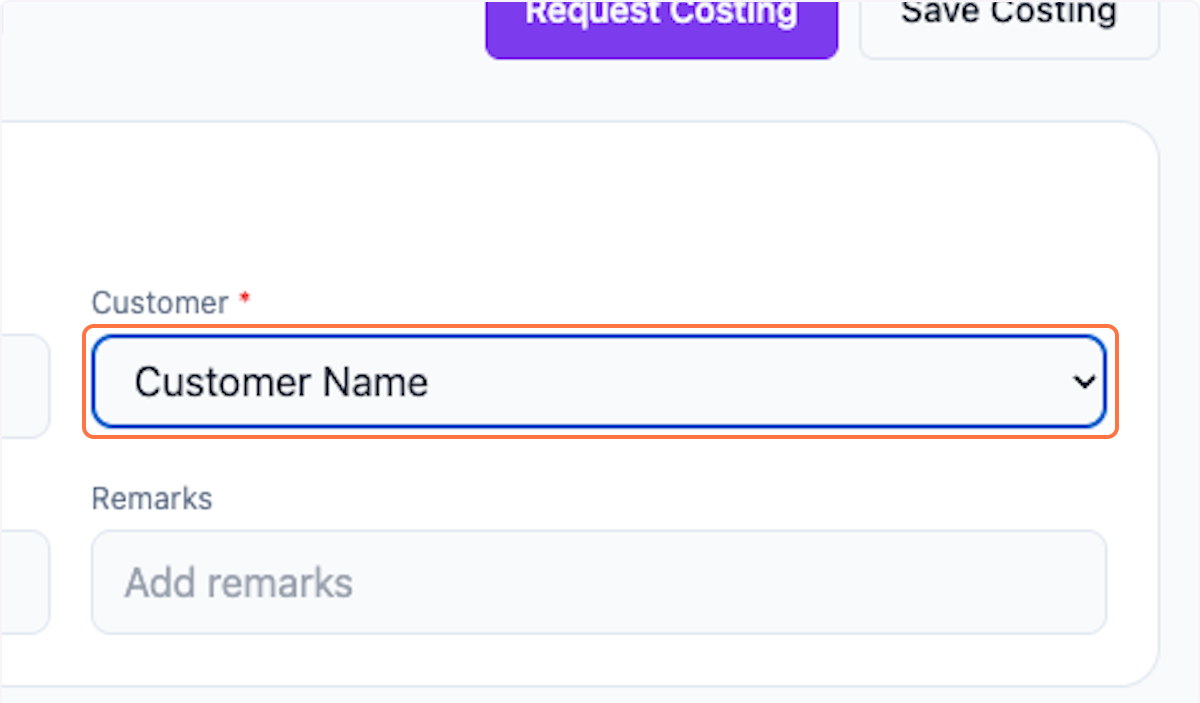
Step 3: Select Customer Name
Select the customer from the dropdown. You need to ensure that the customer is already created, else no data will be shown here.
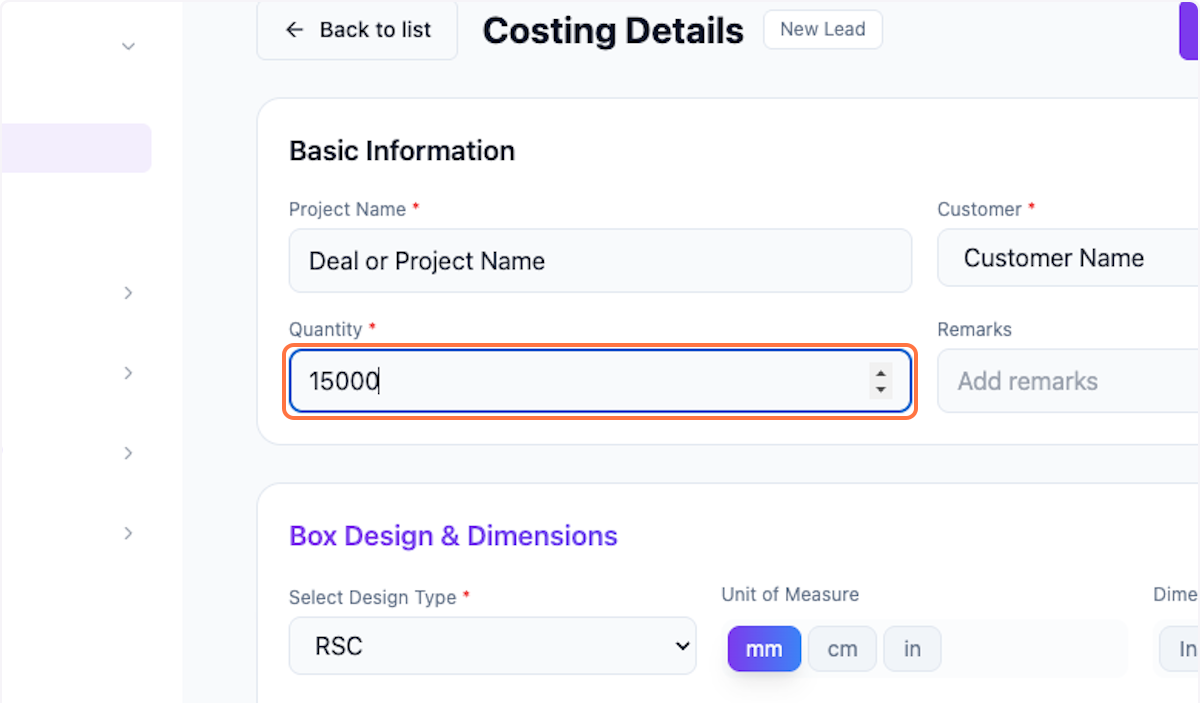
Step 4: Enter Quantity
Enter the required quantity for this deal (e.g., 15000).
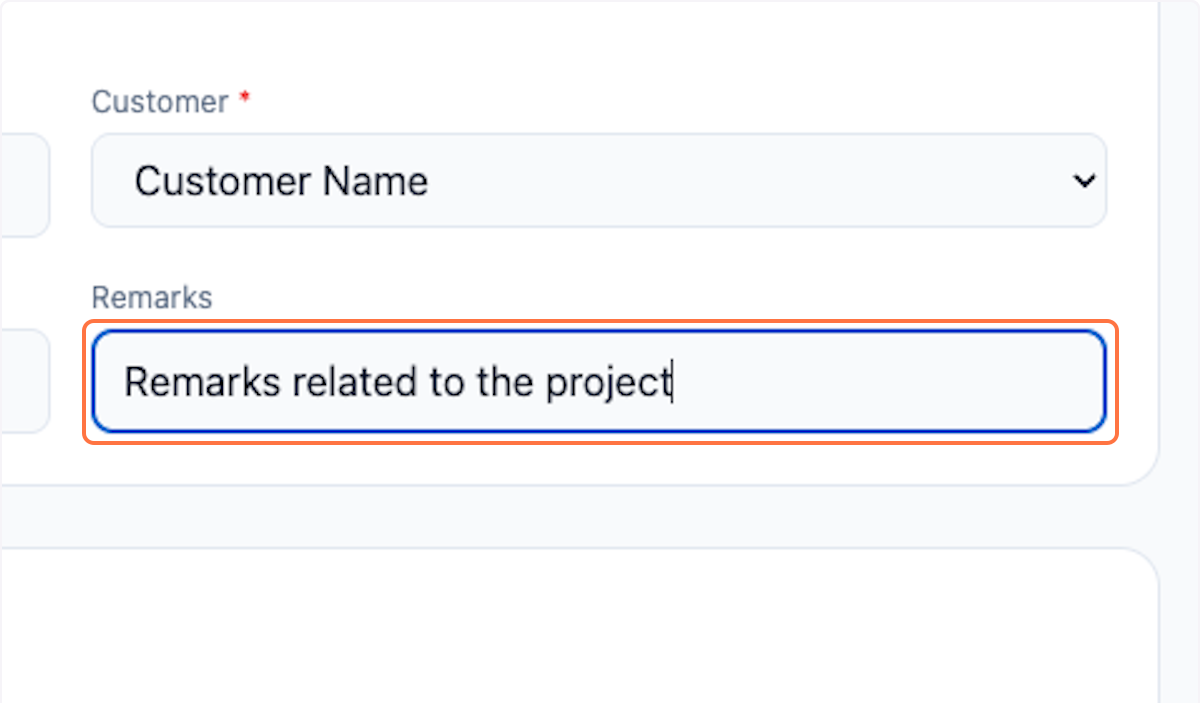
Step 5: Add Remarks (Optional)
Type any remarks related to the project for future reference.
Box Specifications
Step 6: Select Design Type
Choose the box design type. You can customize these options in settings.

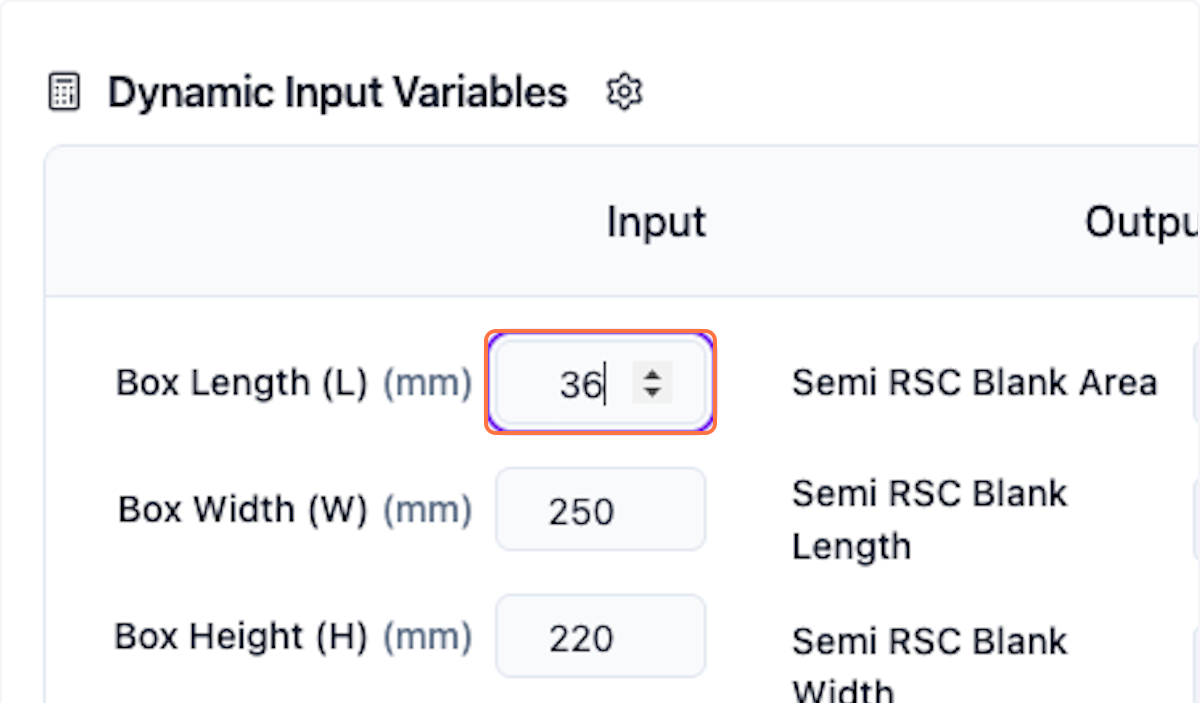
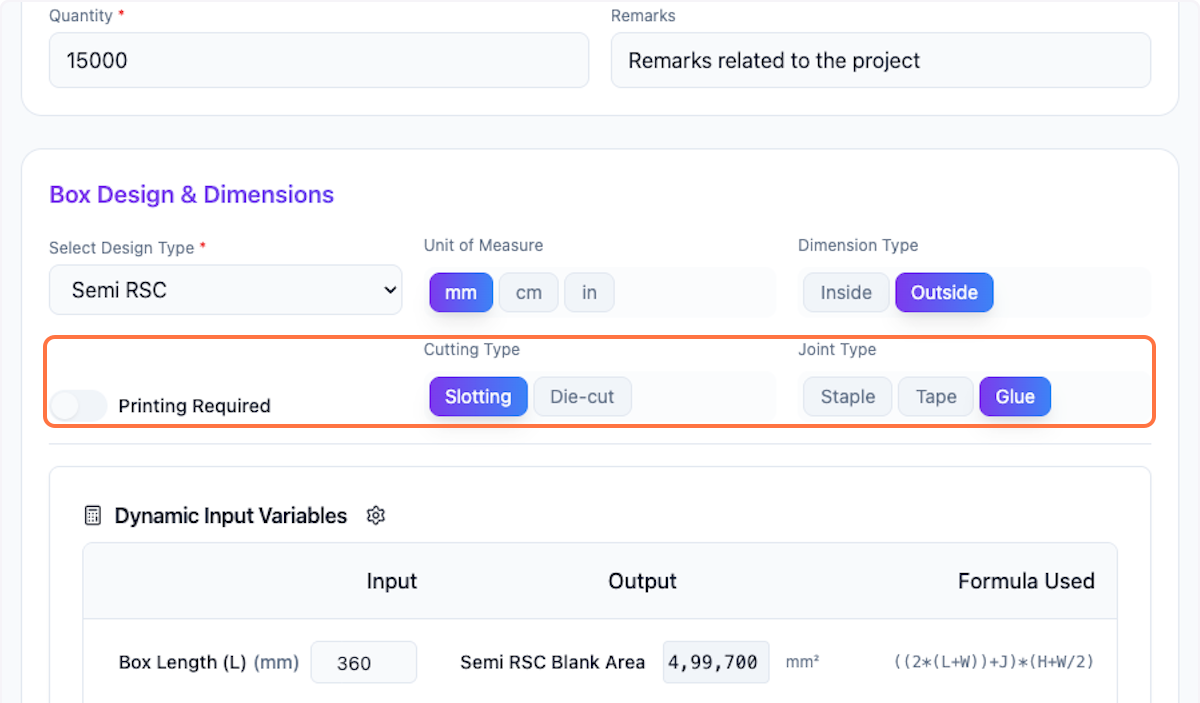
Step 7: Enter Dimensions
Enter the box dimensions (Length × Width × Height).
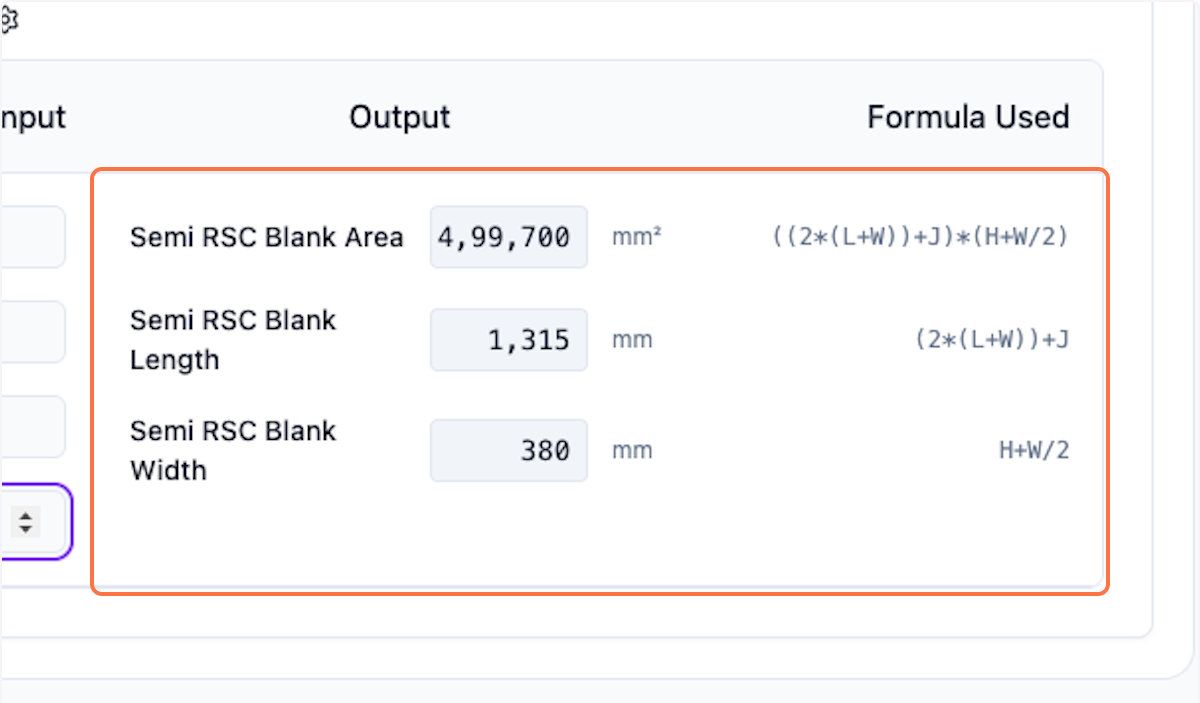
Step 8: View Calculated Output
The values are calculated based on the formula used (shown on the left side). You can also customize the formula.
Step 9: Select Unit of Measure
Choose the correct unit of measure. Default is mm.
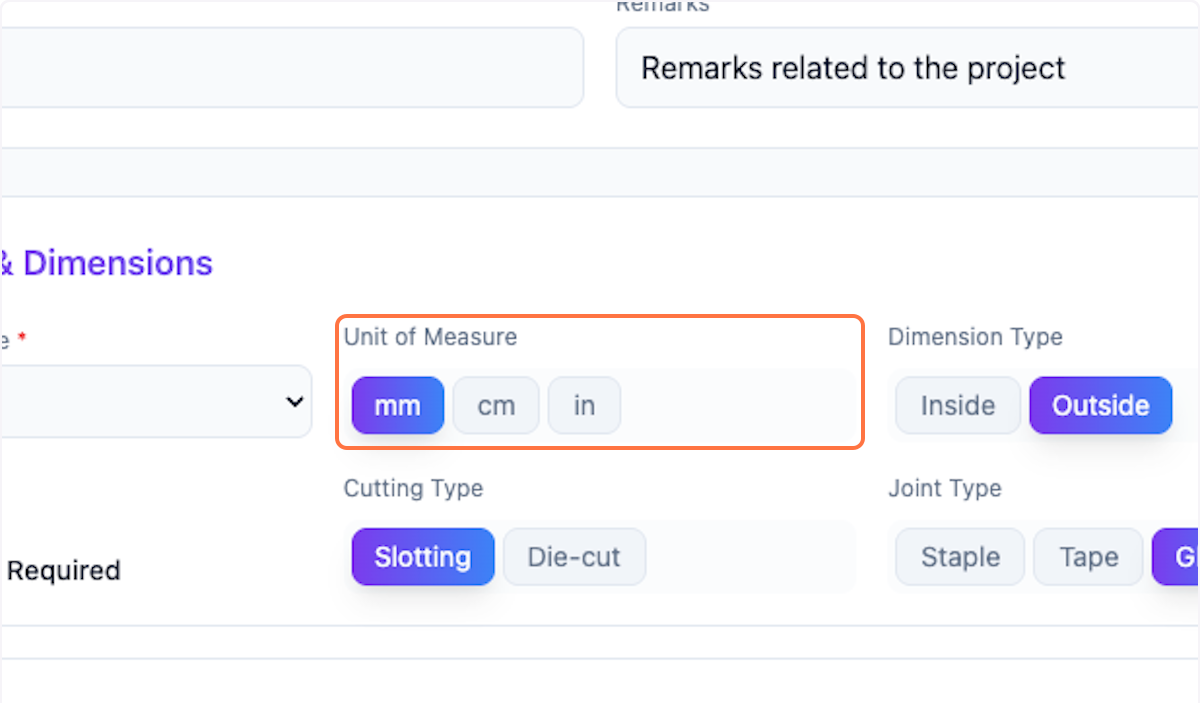
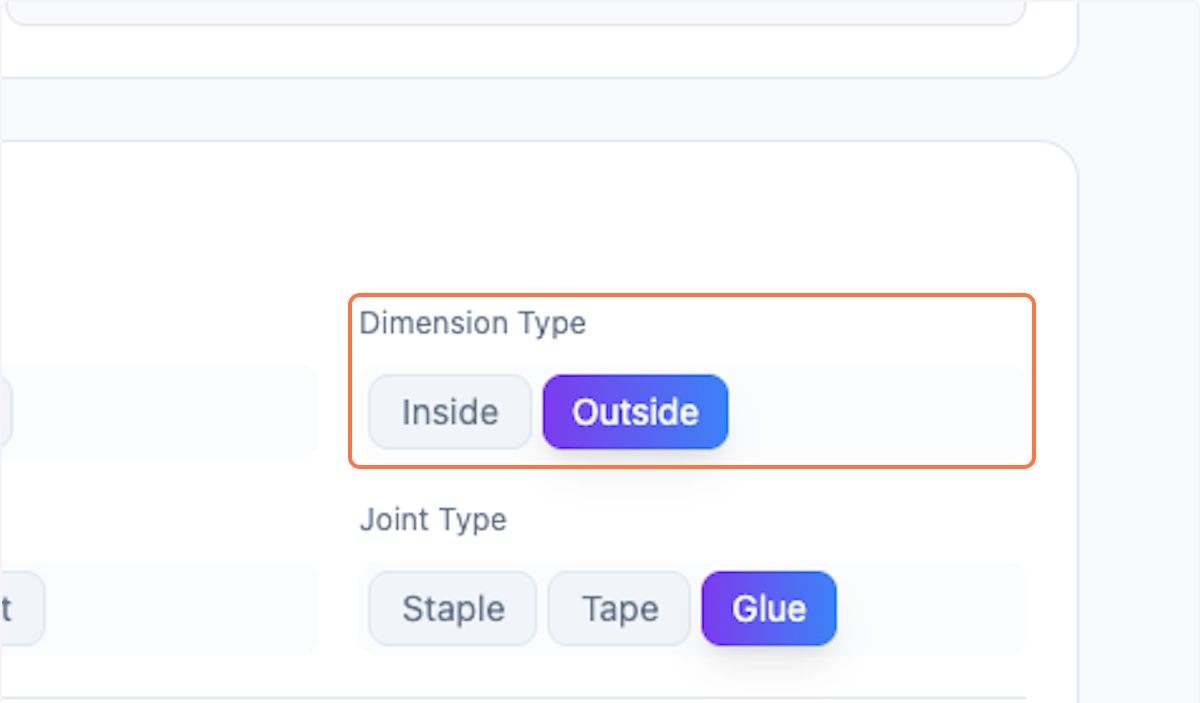
Step 10: Select Dimension Type
Select the dimension type as per your process.
Step 11: Configure Additional Options
Select as per the requirement or go with the default value.
Material Selection
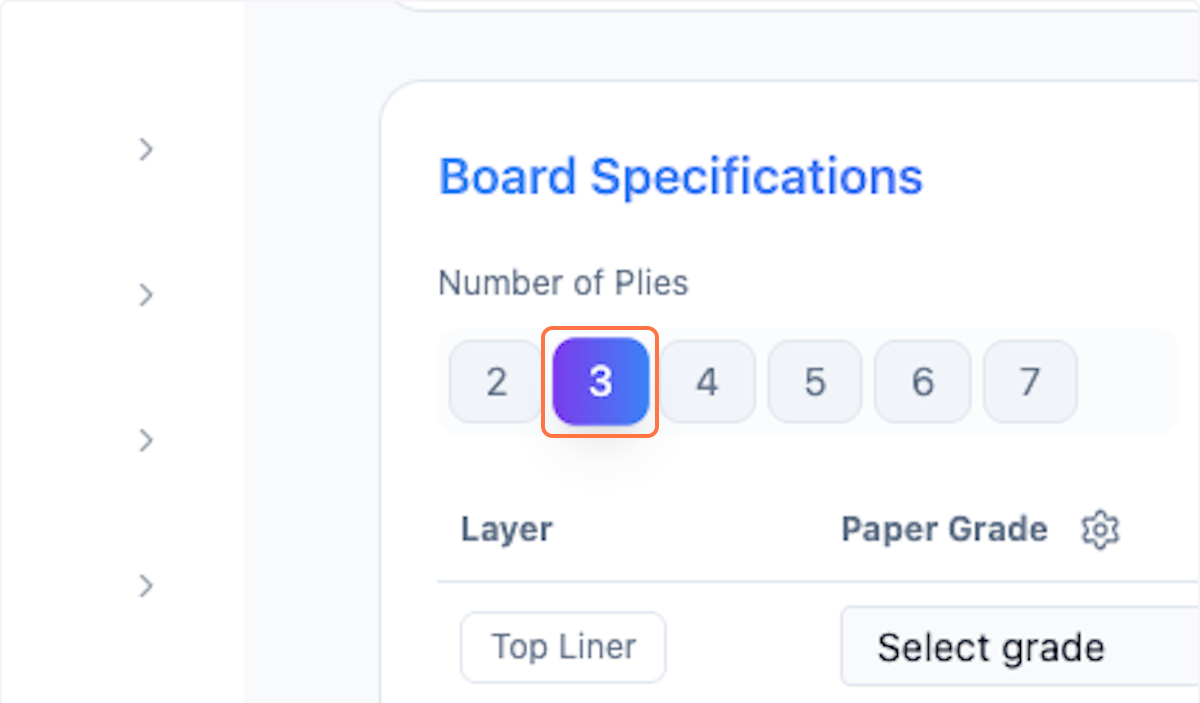
Step 12: Select Number of Ply
Choose the number of ply for the box (3-ply, 5-ply, etc.).
Step 13: Select Paper Grade
Select the paper grade. These are pre-filled and can be customized in settings.
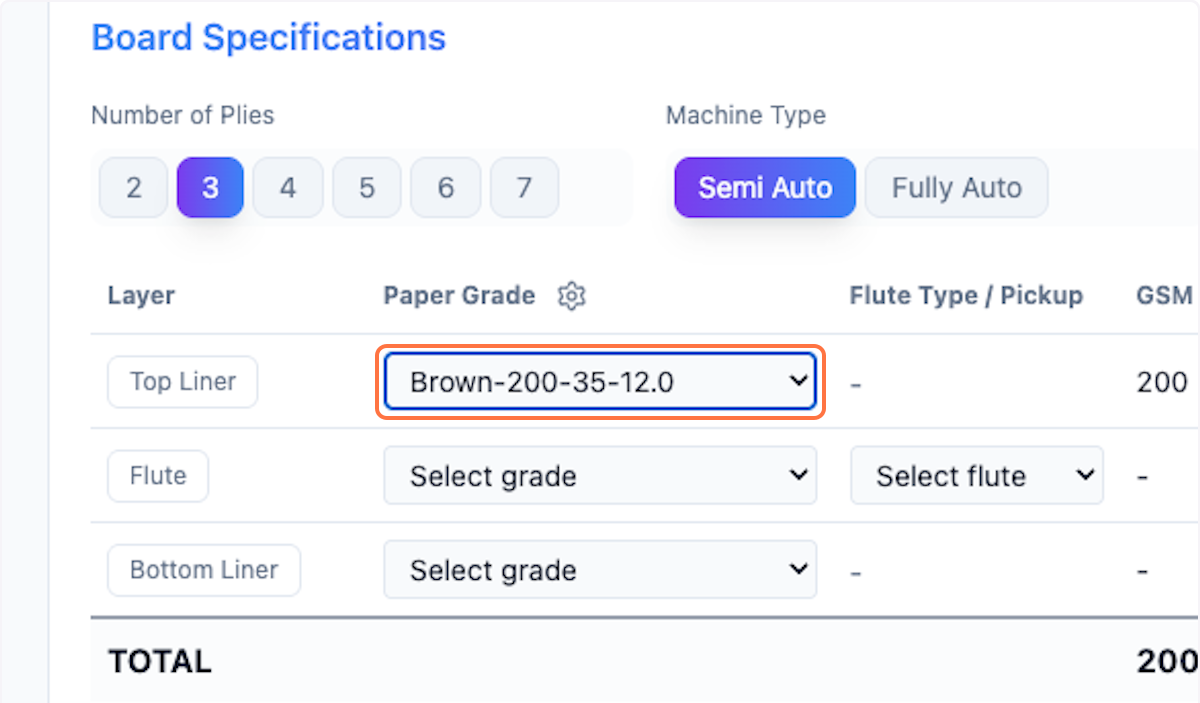
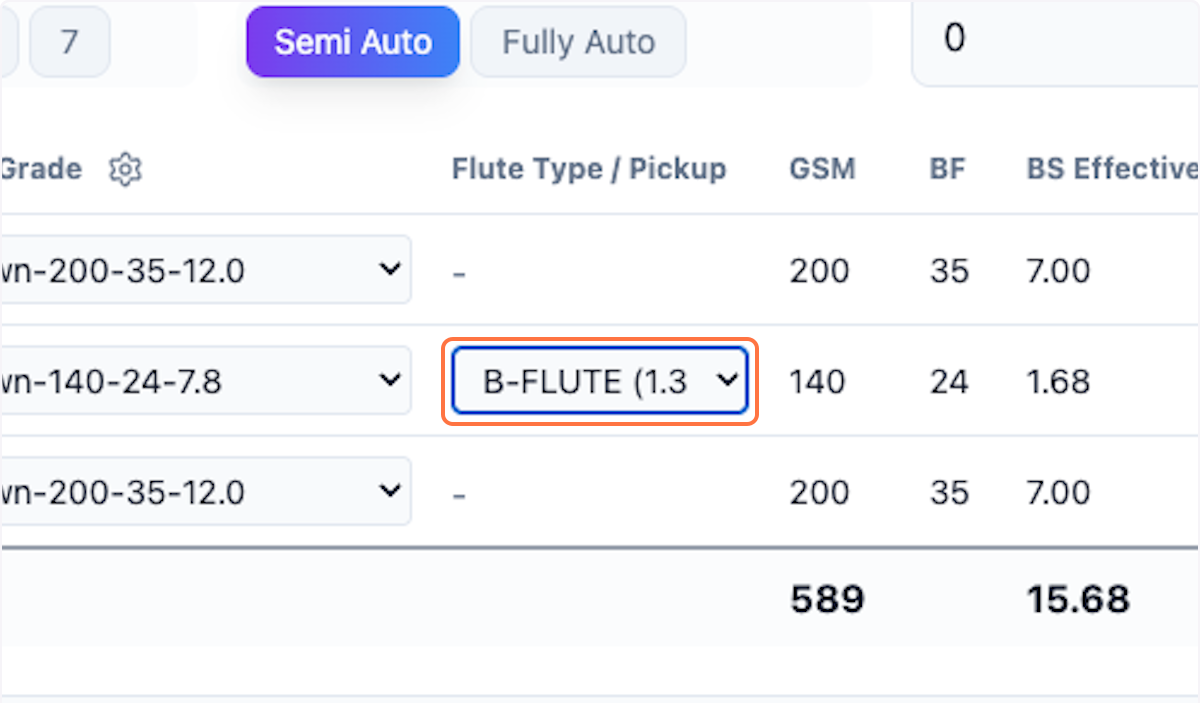
Step 14: Select Flute Type
Choose the flute type (e.g., B-Flute). These are pre-filled and can be customized.
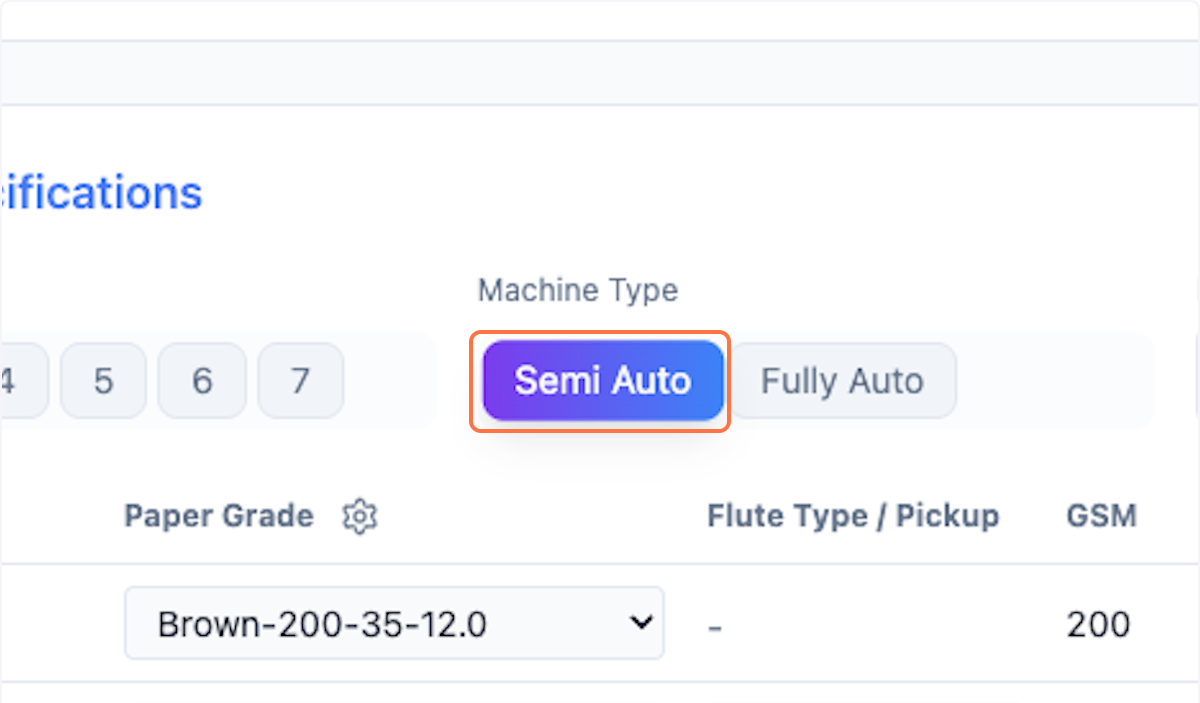
Step 15: Select Machine Type
Click on the machine type (e.g., Semi Auto).
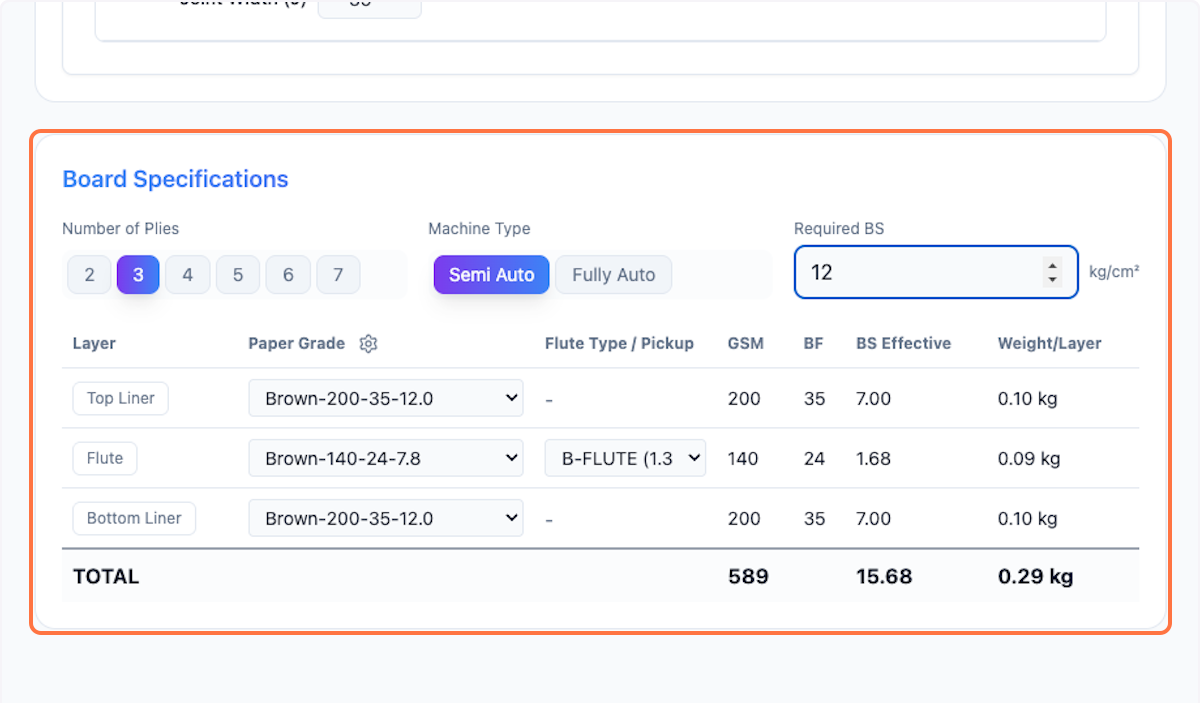
Step 16: Enter Bursting Strength (Optional)
Enter the bursting strength if required.

Step 17: Review Board Specifications
All board specifications are calculated based on your inputs.
Saving the Deal
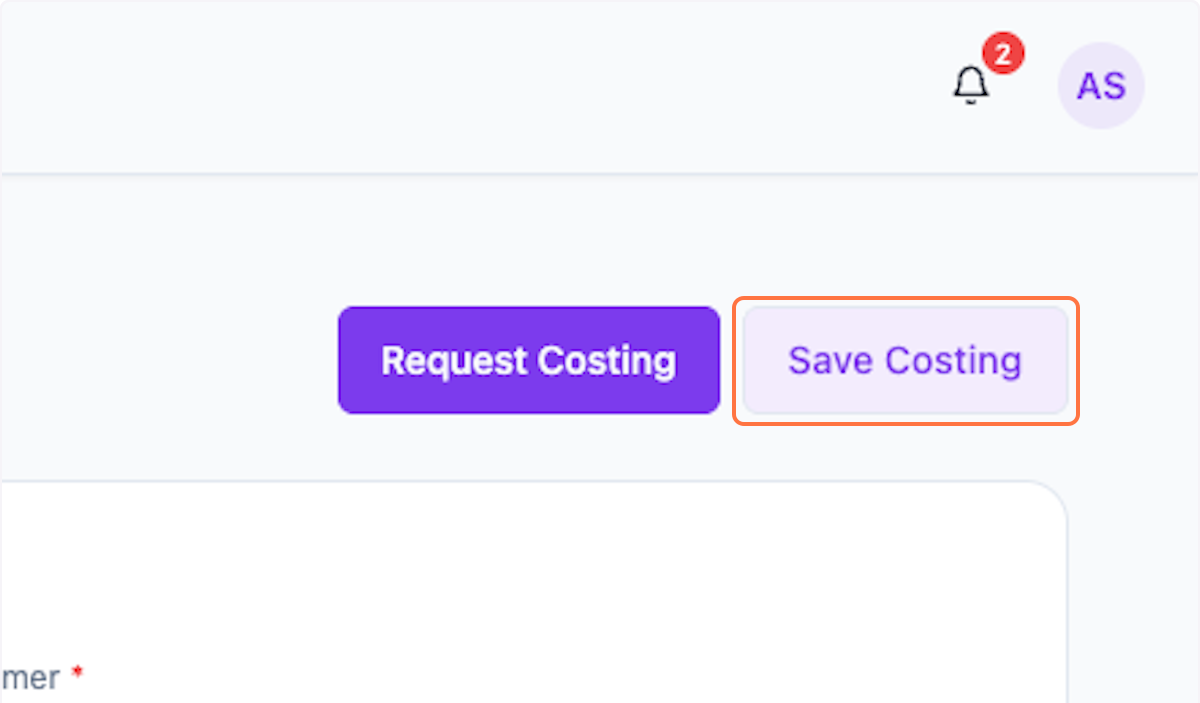
Step 18: Save Costing
Once you are done with all the entries, click Save Costing to save as draft.
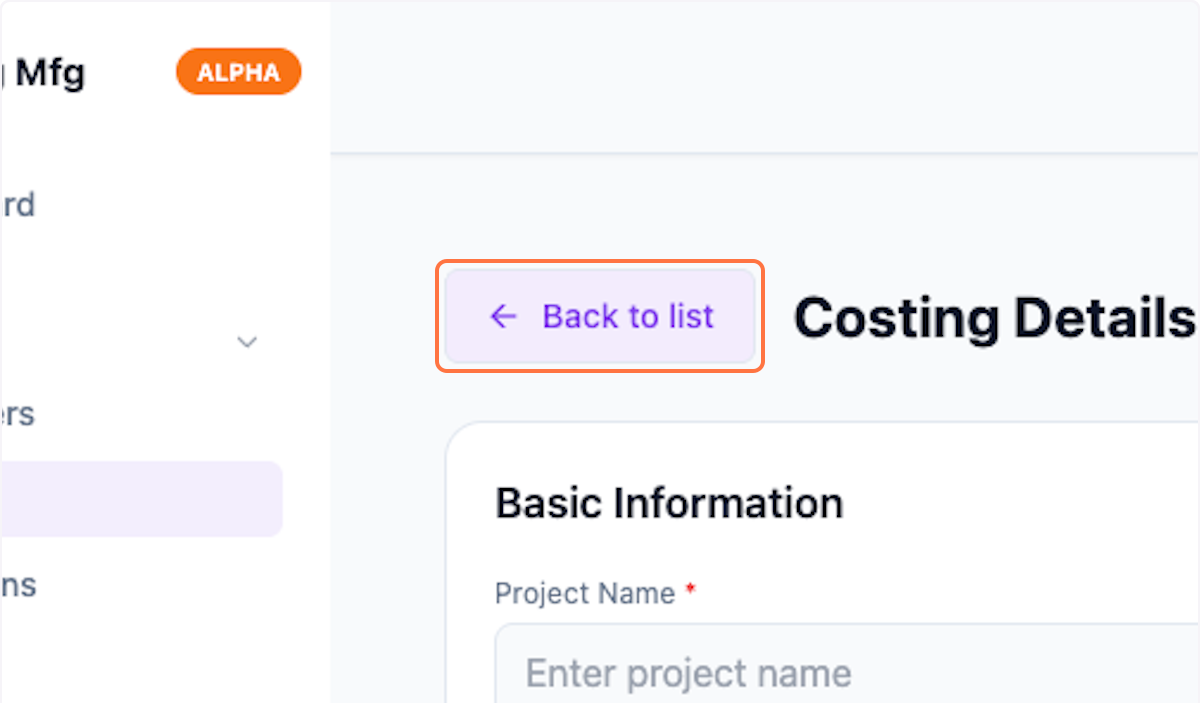
Step 19: Return to List
Click Back to list to close this window.
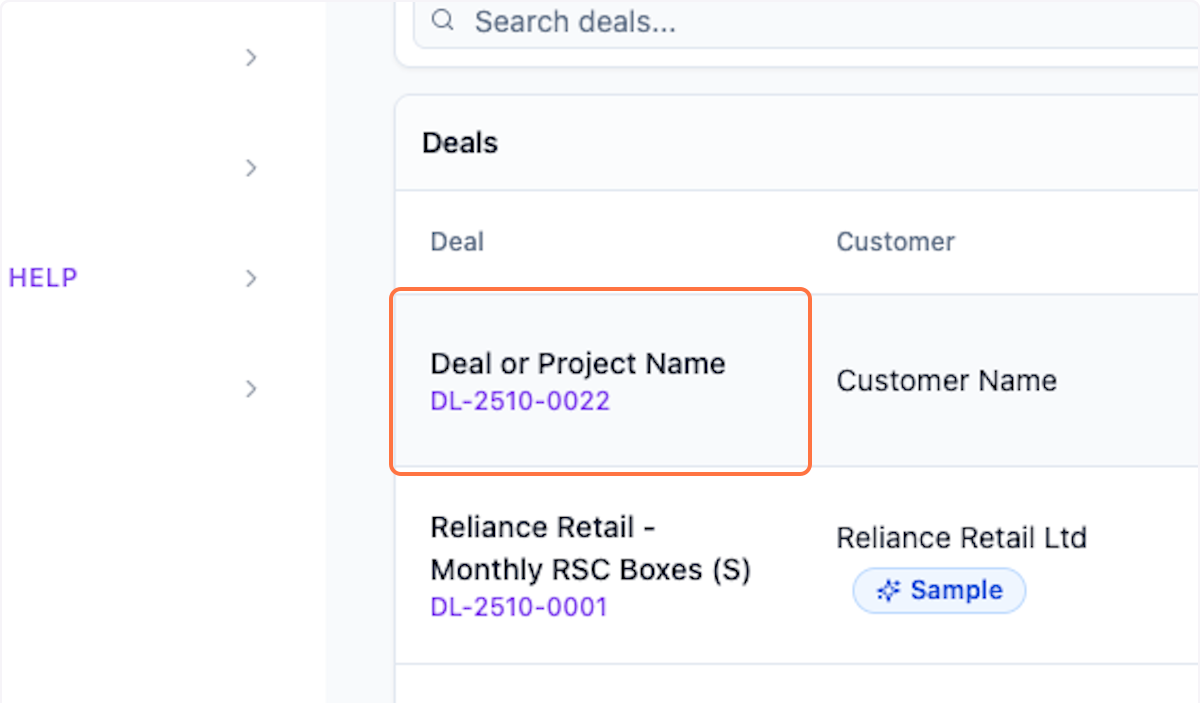
Step 20: View Created Deal
Your new deal or project is created. You can view or edit this deal anytime.
What's Next?
After creating a deal, you can:
- Request costing from your team
- Generate quotations for the customer
- Track deal progress through different stages
- View deal history and activity
Was this helpful?
Let us know if you need more help.